

How To Install Skype In Sony Bravia Android Tv
These days, it can be hard to keep in touch with the people we care about. We still need face-to-face interaction even though we're working from home, and trying to keep socially distanced from our family and friends.
If you're like me, you're probably using video-conferencing apps like Skype and Google Duo more now than ever before.
I started using Skype a few years ago, while my wife was away medical school in the Caribbean. Telephone service on her island was very expensive and suffered from a lot of outages. We needed a more reliable & cheaper way to keep in touch.
Honestly, I don't know how we would have made it through those two years without talking on Skype every day.
Most of us use Skype on our laptops or smartphones, but I bet you didn't know that you can also use it on your Android TV's.
There are a couple of tricks to getting Skype installed and looking great on your Android TV. We'll also cover those in detail in this article.
Can You Use Skype on TV's?
There used to be a version of Skype specifically for Smart TV's called, predictably, Skype on TV. They created it back when Skype was still a privately owned company, before they were bought by Microsoft back in 2011.
After a few years and a few thousand tech-support call later, Microsoft quietly retired Skype on TV.
However, that doesn't mean that you can't use Skype on your Android TV. It just means that you have to go through a few extra steps.
While there's no official Android TV version of Skype, I was able to successfully sideload the regular Android version of Skype on my NVIDIA Shield TV.
After a couple of tweaks, it was working great.
How to Install Skype on Android TV
There are several different ways to install Skype on your Android TV. In this section, I'm going to walk you through two of the most popular.
The first method is directly through the Aptoide TV app store. Aptoide TV is an alternative app store that has been used by over 200 million people since it began.
If you're not familiar with Aptoide TV, I wrote an article showing how to install it on your Android box and Android TV here.
The second method is sideloading the Skype APK directly from APKMirror. APKMirror is one of the most popular repositories of Android installation packages (APK).
It takes a little more effort to sideload an app versus installing it from the Google Play Store or Aptoide TV. However, there are certain apps that you can only install by sideloading, so it's definitely worth knowing how to do it.
Install Skype Through Aptoide TV
To get started, open Aptoide TV on your Android TV or TV box and click on the magnifying glass icon in the upper left-hand corner of the screen.
Then search for 'Skype.'
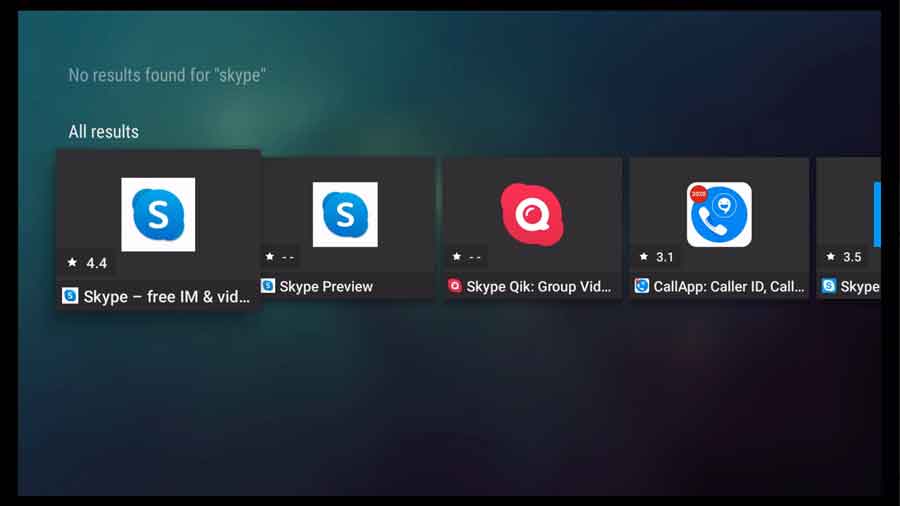
Depending on when you're reading this, you'll probably see a few different versions including Skype Preview and Skype Lite. We're going to be installing the latest release of the official Android version of the app: Skype – Free IM & Video Calls.
When you search on Aptoide TV, it sorts the relevant search results by the most popular. That means that the latest release should be the first result listed.
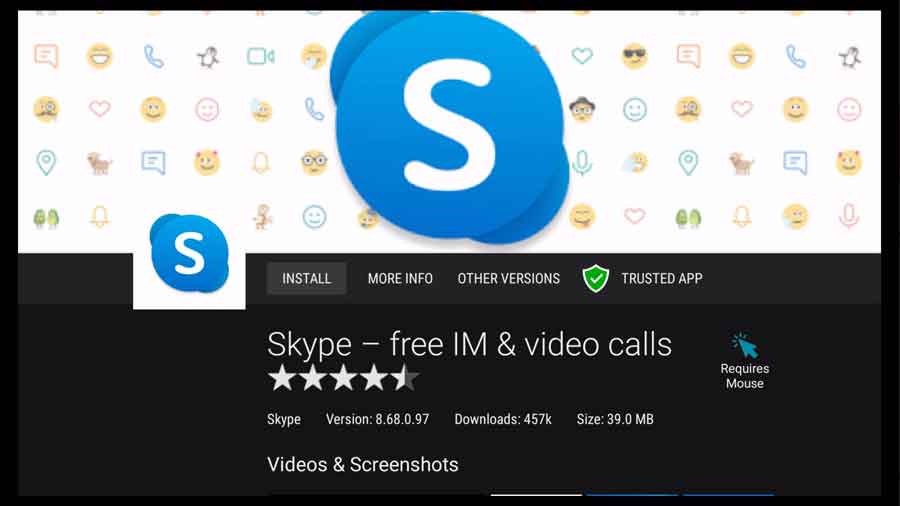
If you click into a result, you can see some basic information like the number of downloads, who published the app and whether it's a 'Trusted App' or not.
Just be sure that you're downloading the full version of Skype, not a preview or 'Lite' version. Hint: Comparing the total number of downloads is an easy way to tell which one to choose.
Once you've got the right app, click on the Install button to start the download process.
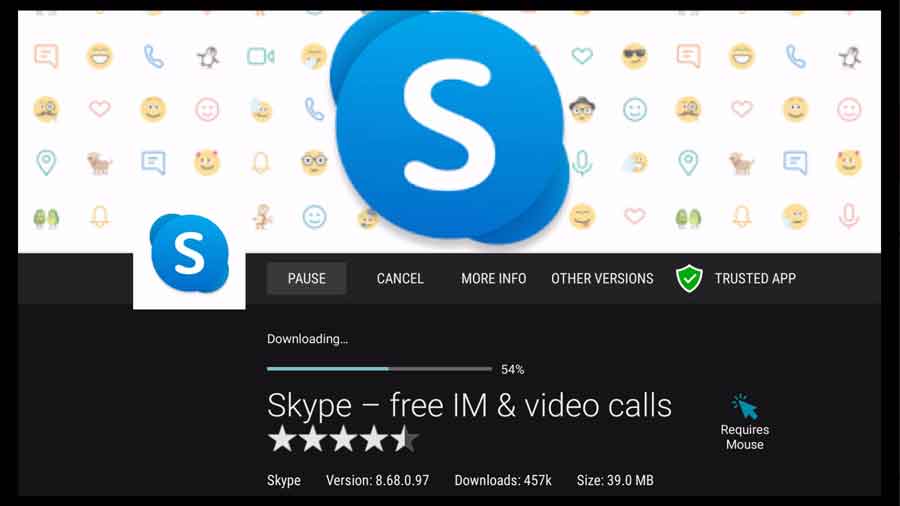
The Skype APK is only around 40MbB, so it should only take a few seconds to download, depending on your Internet speed.
Once that's completed, Aptoide TV will automatically start the installation process.
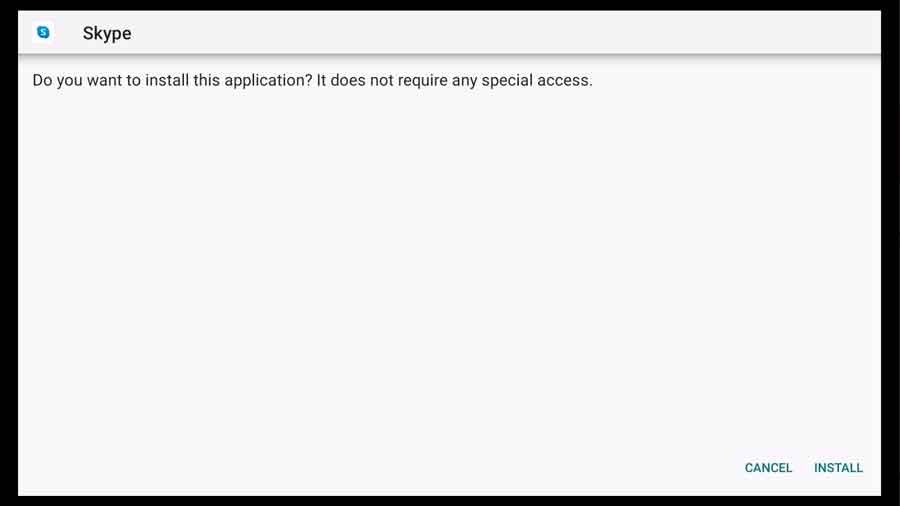
Skype doesn't require any special permissions at this point. The first time you open it, Skype will ask for permission to access your contacts, webcam and microphone. We'll get into those in a later section.
For now, click Install to continue.
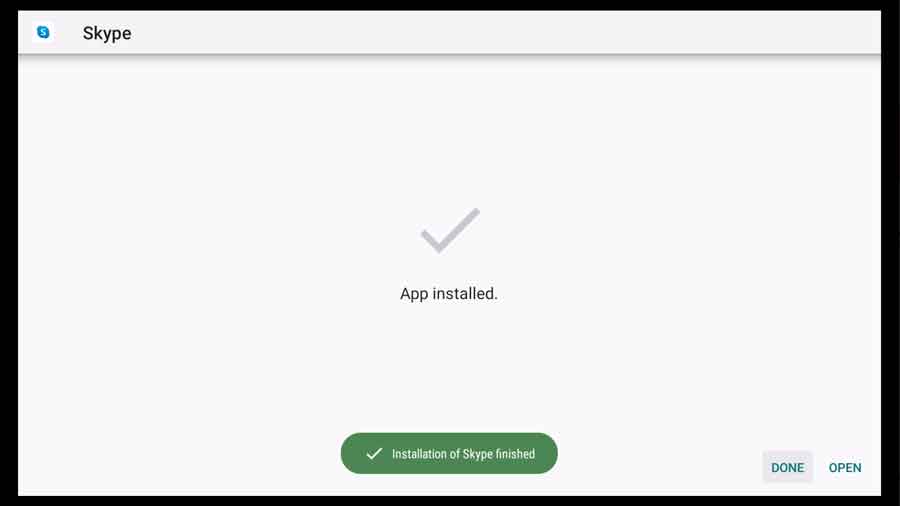
A few seconds later, you'll see the message that Skype has been installed successfully.
You can open Skype directly from this screen, or click Done to return to Aptoide TV. For now, click Done and go back out to your Android TV home screen.
Skip down to the section on How to Set Up Skype on Android TV to continue.
Sideload Skype Through APKMirror
In this section, we'll cover how to install Skype from APKMirror. If you don't have Aptoide TV installed, or if you'd prefer to install a specific version of Skype on your Android TV, then this is the method to use.
To get started, you'll need to have a web browser installed on your Android TV device. Any browser that can download files is fine (like Chrome).
In this example, I'm going to use the Downloader app. It's a purpose-built app specifically designed to make it easy to search for APK files and install them on your device. You can read all about it in my article here.
To get started, open the Downloader app.
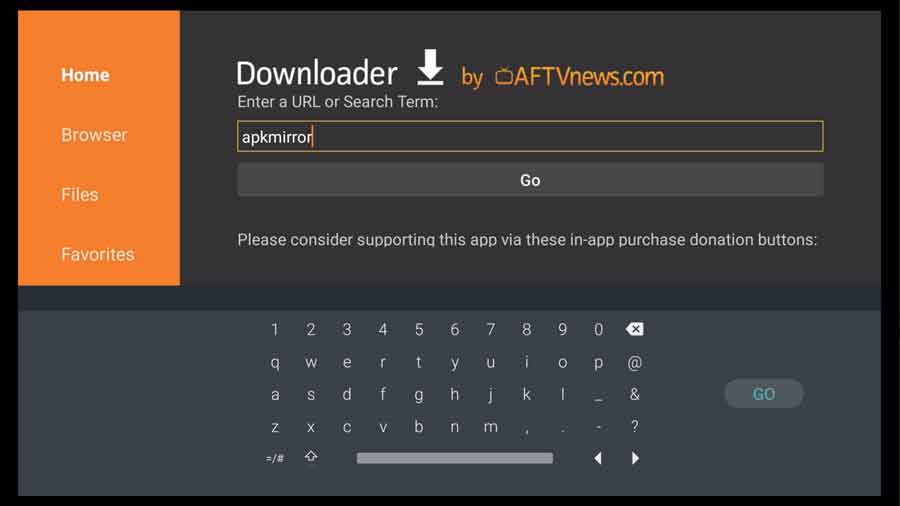
On the Home screen, type 'apkmirror' in to the search box and click Go.
This pulls up a Google search results page. After you scroll past the ads, it should be the first result.
Click to go to APKMirror.com.
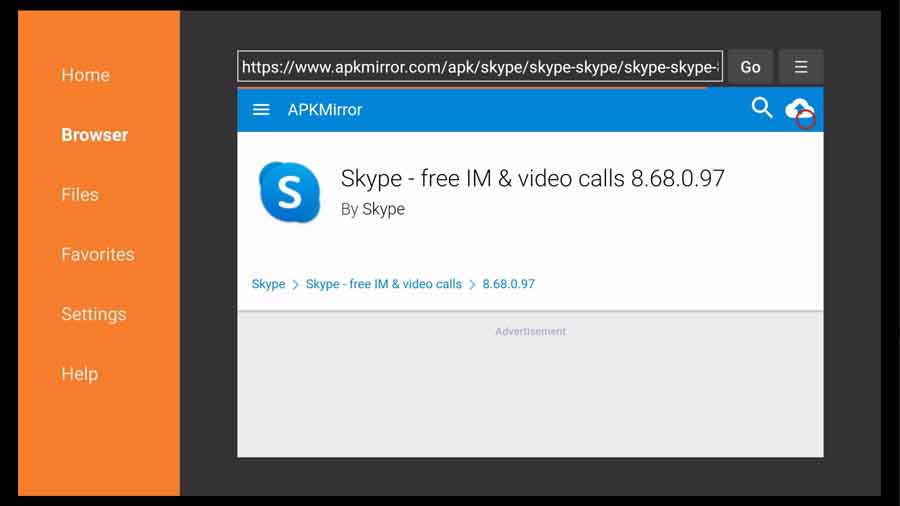
Once there, click the magnifying glass in the upper right-hand corner to open the search bar.
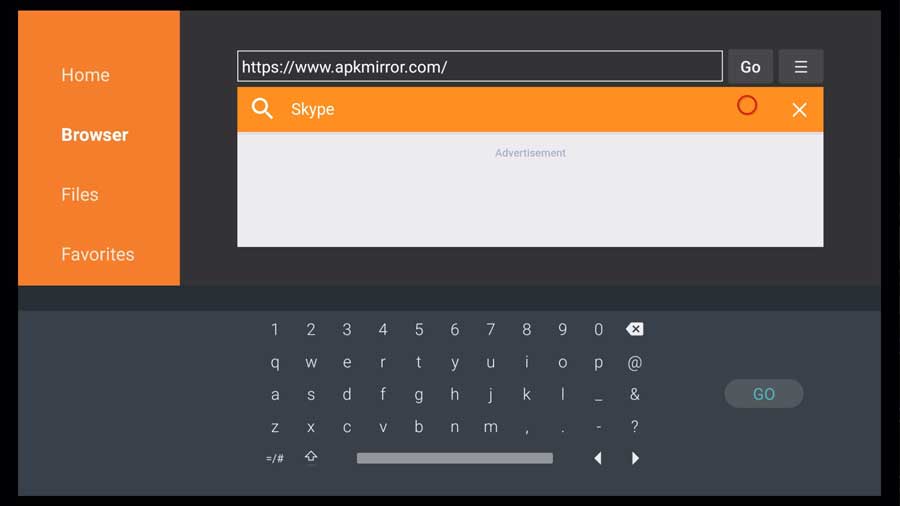
Type in Skype and click Go.
This will return all the different versions of Skype APK's that are available. Similar to the previous method, you're going to want to look for the latest full version of the Skype app.
Do not download Skype Early Access versions.
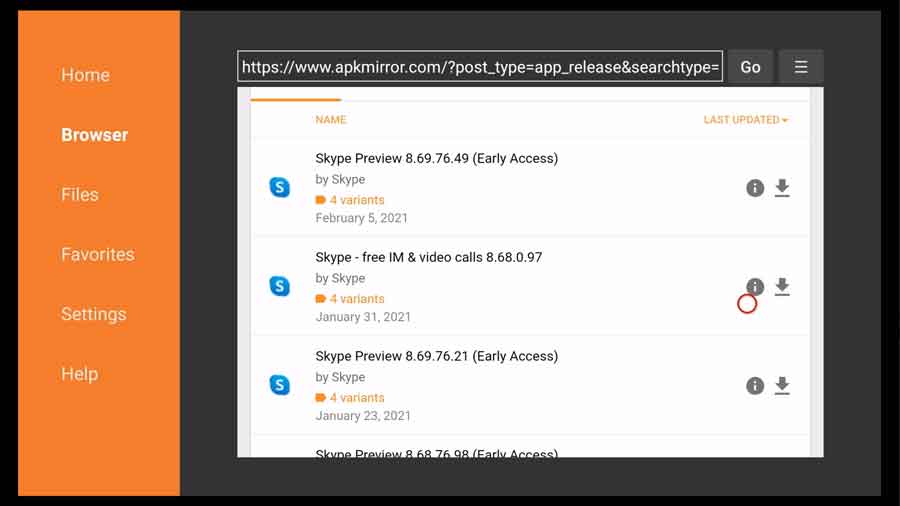
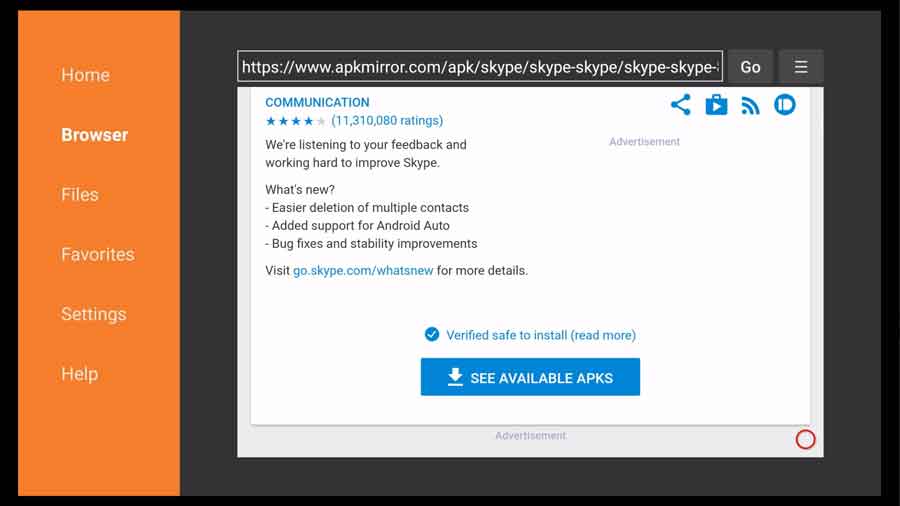
Once you've found the latest full version, click on the download icon on the right-hand side of the row.
This takes you to the file's detail page.
Scroll down until you see a blue button that says See Available APK's. Click on it to continue.
Each APK is available in different versions. Here you can see there are four different versions of the same file. From the top, we have an ARM 32-bit version, an x86 version, an ARM 64-bit version and a 64-bit x86 version.
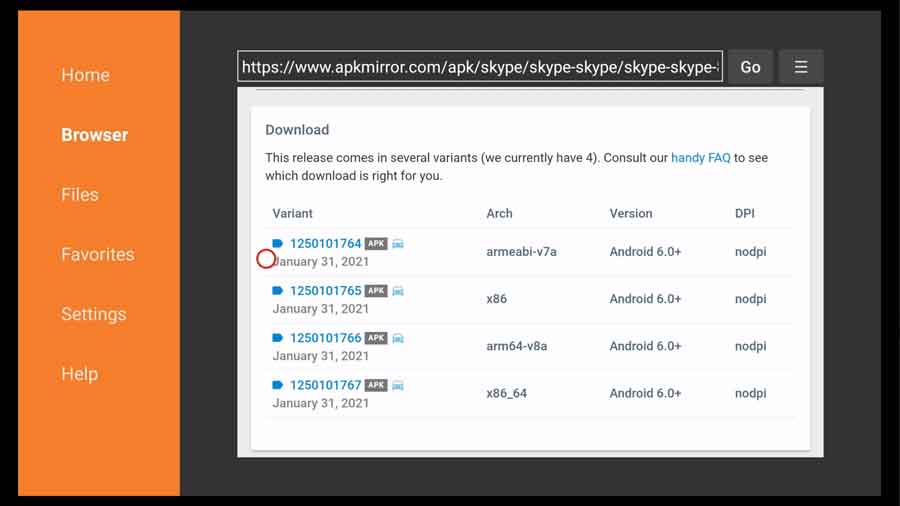
Most Android devices have some version of an ARM processor in it. By contrast, if you have a Windows PC, it probably has an x86 processor.
Without getting into too much detail, for most Android TV devices, you should always download the 32-bit ARM version. You may sacrifice a bit of performance, but you'll have far fewer compatibility issues.
Click on the top row to go to it's download page.
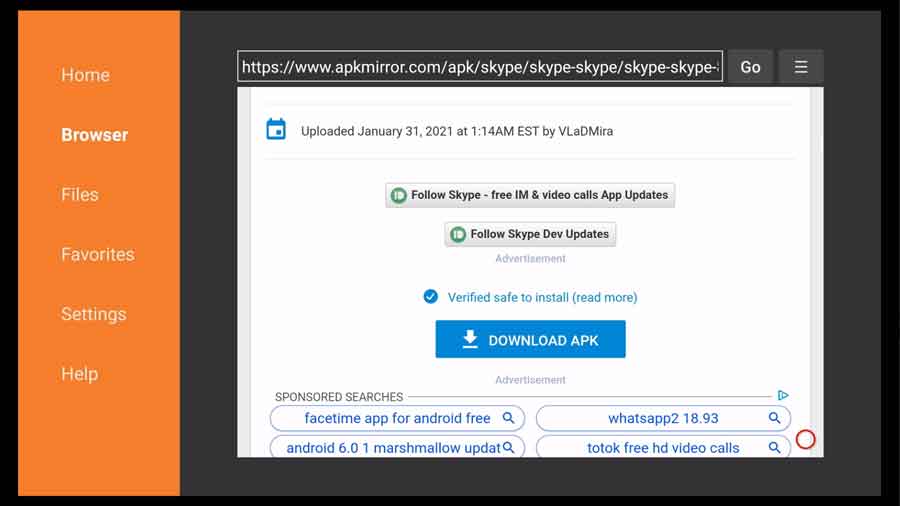
Once you're there, scroll down until you see the blue Download APK button. Click on it to start the download process.
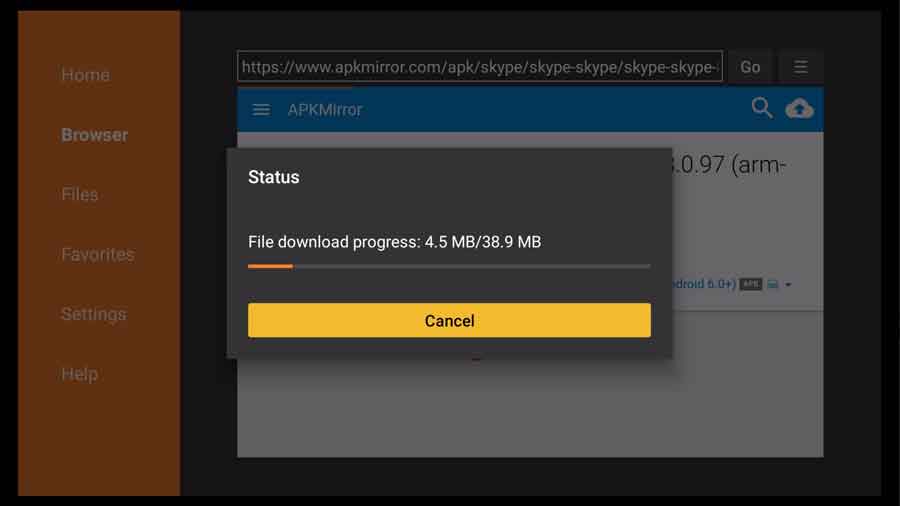
The Skype APK is around 40 MB, so it should only take a few seconds to download. Once it finishes, Downloader will begin the installation automatically.
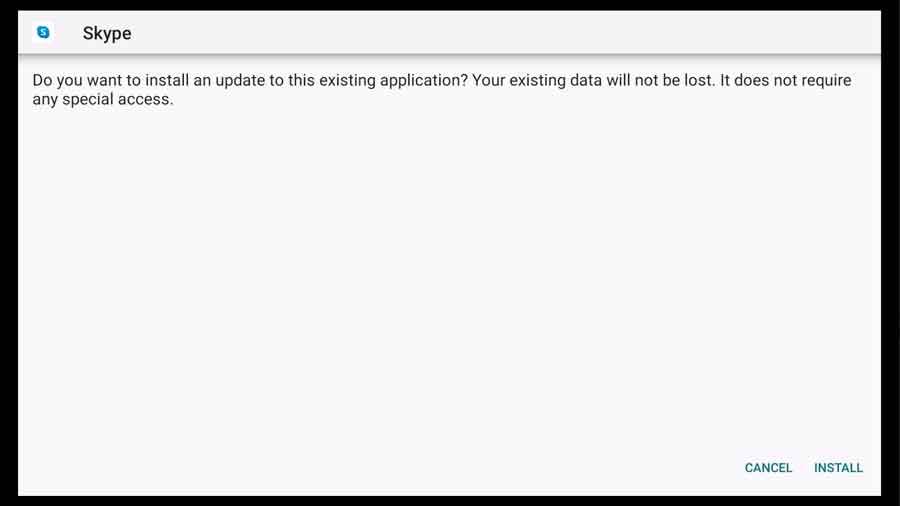
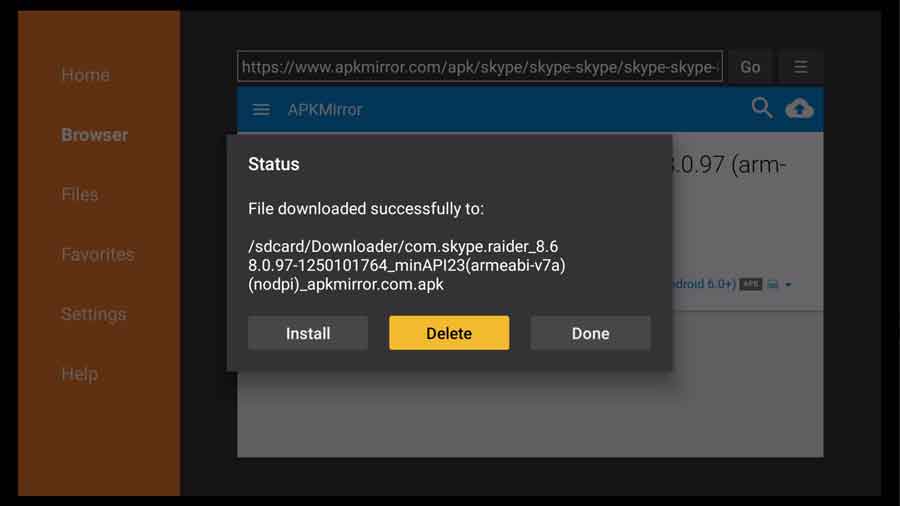
Click Install to install the Skype APK on your Android TV.
Once you're done, you won't need the APK file any more. So remember to delete it to save space on your device.
Go back to your Android TV's home screen and we'll open Skype and get it configured on your device.
How to Set Up Skype on Android TV
No matter which method you used to install Skype on your Android TV, the process is the same once you open the app.
However, there are a few quirks to getting Skype to look right on your Android TV. So be sure to stick around until the end for some important final steps.
Since we sideloaded Skype, we'll need to open it using Sideload Launcher, or a similar program.
Don't worry, we'll create a shortcut on the home screen at the end.
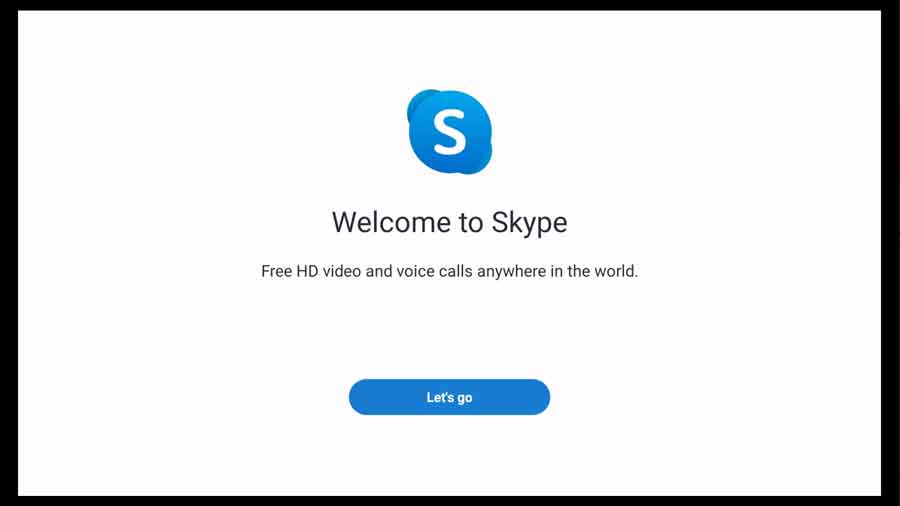
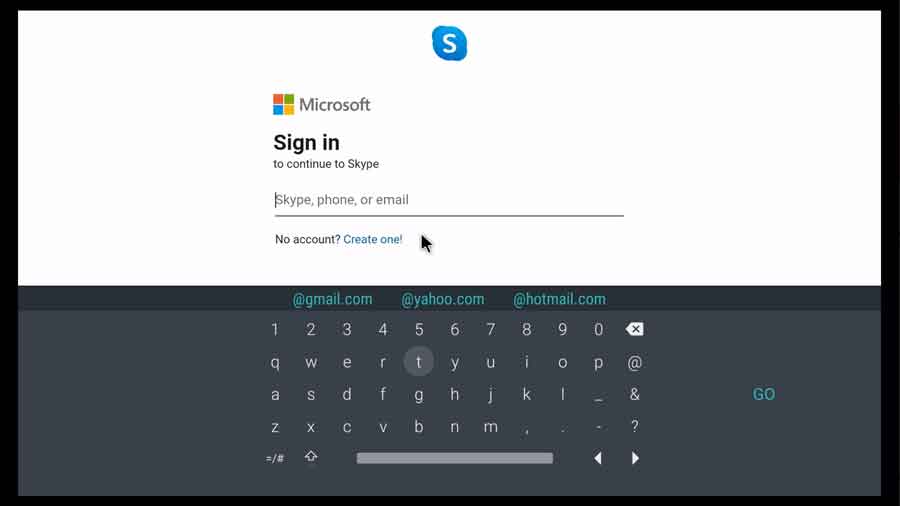
The first time you log in to Skype, it'll ask you to Log In or Create an Account.
For the purposes of this article, I'm going to assume you've already got a Skype account. If not, head on over to Microsoft's signup page. It'll be easier to sign up for Skype on your PC rather than your Android TV.
Enter your username and password in the next screen. Here's where I recommend having a USB keyboard or Air Mouse hooked up to your Android TV. It makes entering usernames and passwords MUCH easier.
After you successfully log in, Skype will ask for permission to access your contacts. While you don't need to do this to be able to use Skype on your Android TV, it definitely makes it easier to start conversations with your family and friends.
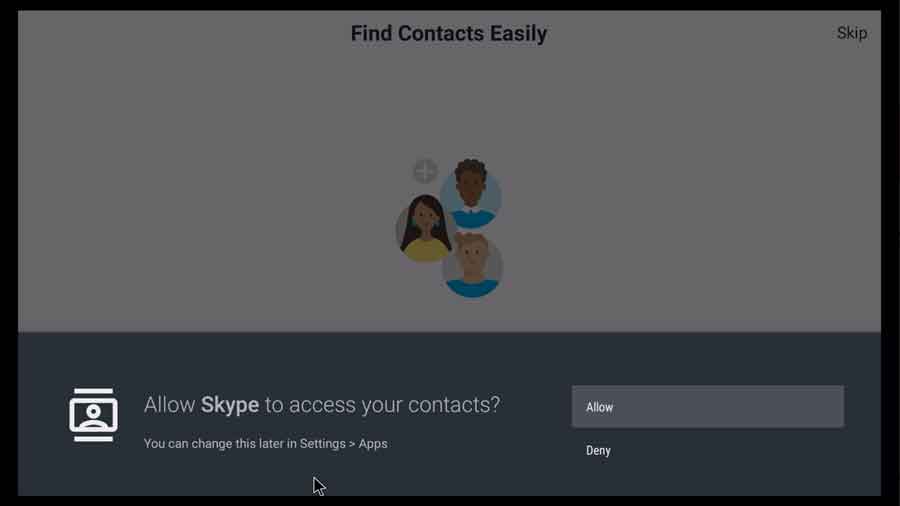
Click Allow to continue.
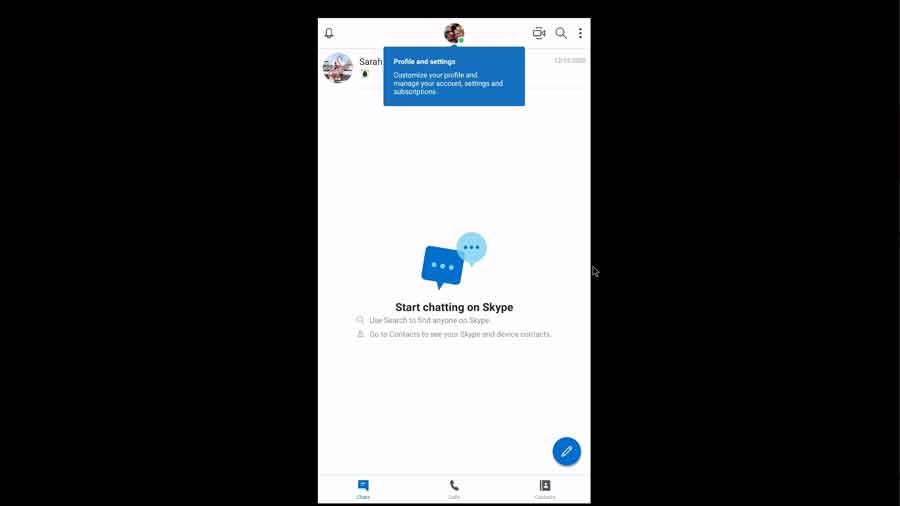
At this point, Skype threw me a curve ball. It suddenly switched from Landscape mode to Portrait mode for the rest of the installation.
If this happens to you, I've got a fix for this in the Final Steps section.
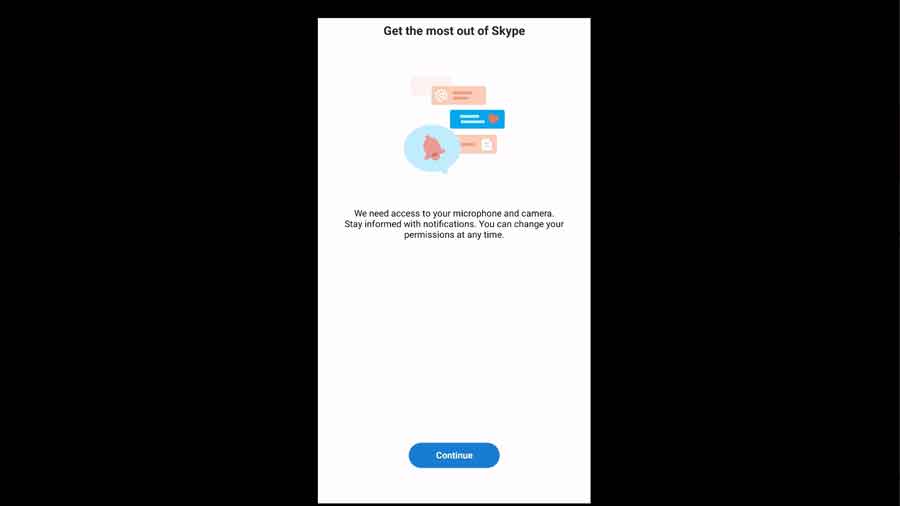
Next, Skype asks for permission to access your device's webcam and microphone. Even if you don't have these installed right now, go ahead and Allow both of these permissions.


Once that's finished, Skype will automatically pull up your contacts and any active conversations you've got running on other devices.
Final Steps
Now that Skype is up and running on your Android TV, let's make it easier to use.
Force Skype to Landscape Mode
As I mentioned, halfway through the setup, Skype switched from Landscape mode to Portrait mode. Remember that we installed the pure Android version of Skype, not a native Android TV app.
Since this version of Skype was designed for smartphones and tablets, it still has the screen rotation enabled. But that's not what we want on our televisions.
Thankfully, that's easy to fix. I've written an article showing step-by-step how to force an Android app into either Landscape mode or Portrait mode. I'll go over the highlights here, but for all the details, I recommend you check it out.
To start, you'll need the Set Orientation app, which you can find on either Aptoide TV or APKMirror. You can install it using the same process that you used to install Skype.

Set Orientation has several options that you can choose from. Normally, I like to leave it in Automatic.
Even though it works for most apps, Skype still wanted to rotate to Portrait mode sometimes. I recommend setting Set Orientation to Landscape mode so you'll never have to worry about it.

Create a Home Screen Shortcut
Remember when I said that you needed an app like Sideload Launcher to open Skype?
We're going to fix that here.
Any time you sideload an app on your Android TV, the system doesn't create a shortcut automatically. I have an article showing several different ways to create a shortcut for your home screen.
I used this website to create a Leanback Shortcut, which Android TV uses to launch apps.
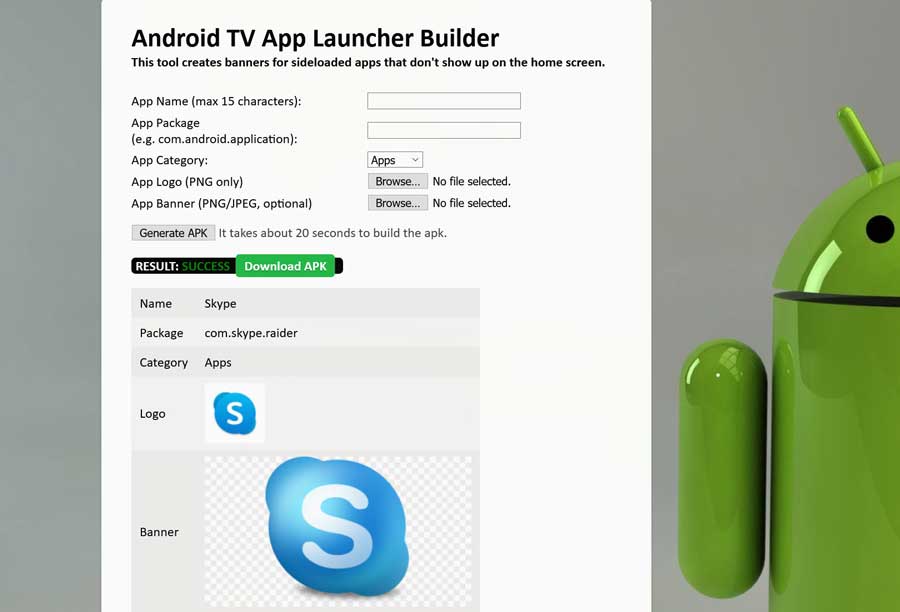
The process is a little involved, so I definitely recommend checking out my article for all the details.
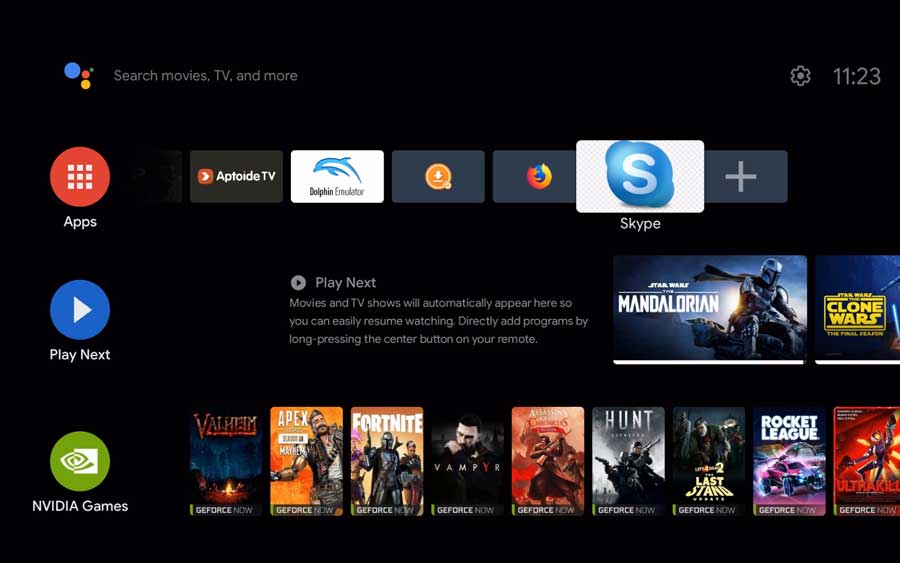
Once I created the shortcut and installed it on my Android TV, I was able to open Skype right from the shortcut on my home screen.
Can You Use a Webcam With Skype on Android TV?
It is possible to use a webcam with your Android TV, depending on the model you have. As long as the camera has UVC compliant drivers for Linux, Android will recognize it right away.
I was able to get my Logitech C920s up and running easily with Skype on my NVIDIA Shield Android TV.
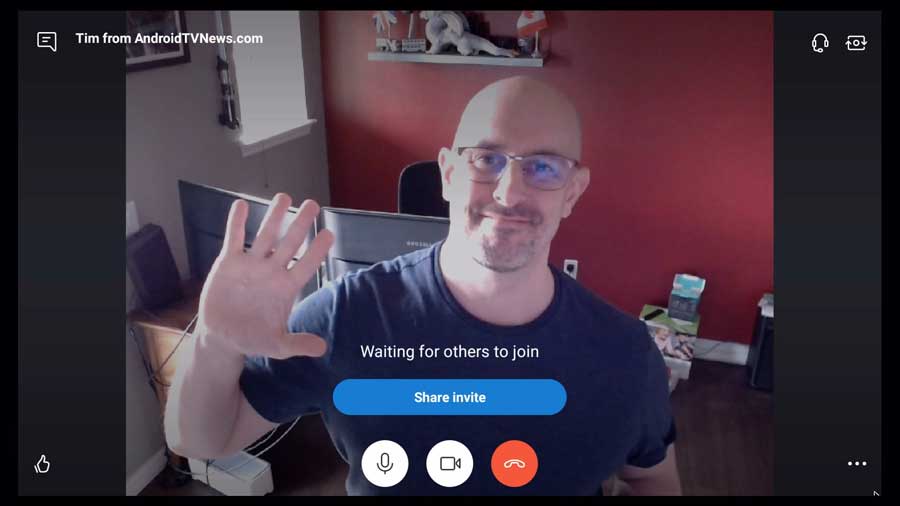
I'm putting the finishing touches on an article that will go into more detail which webcams will work on Android TV.
Look for that soon, but for now, enjoy using Skype on your Android TV!
How To Install Skype In Sony Bravia Android Tv
Source: https://androidtvnews.com/skype-for-android-tv/
Posted by: dykebutiedis.blogspot.com
0 Response to "How To Install Skype In Sony Bravia Android Tv"
Post a Comment