

How To Install A Bootloader To Arduino Clone
Overview
Do y'all take a bricked Arduino that won't accept code anymore? Or, maybe yous wrote your own firmware and would similar to upload it to your Arduino? Or, maybe you just desire to learn more about the inner-workings of Arduino, AVR, and microcontrollers in general. Well, you're in luck! This tutorial will teach yous what a bootloader is, why y'all would need to install/reinstall it, and go over the process of doing so.
Suggested Reading
You may want to check out these tutorials earlier continuing down the bootloader path.
- What is an Arduino
- Installing the Arduino IDE
What is a Bootloader?
Atmel AVRs are great footling ICs, simply they can be a bit tricky to plan. Yous demand a special developer and some fancy .hex files, and its not very beginner friendly. The Arduino has largely done away with these bug. They've put a .hex file on their AVR chips that allows yous to program the lath over the serial port, meaning all you demand to programme your Arduino is a USB cable.
The bootloader is basically a .hex file that runs when you turn on the board. It is very similar to the BIOS that runs on your PC. It does two things. Showtime, it looks effectually to meet if the computer is trying to program it. If information technology is, it grabs the programme from the computer and uploads it into the ICs retention (in a specific location so as not to overwrite the bootloader). That is why when you effort to upload code, the Arduino IDE resets the chip. This basically turns the IC off and back on again so the bootloader can start running again. If the computer isn't trying to upload lawmaking, it tells the fleck to run the code that's already stored in memory. Once it locates and runs your program, the Arduino continuously loops through the program and does and so as long equally the board has ability.
Why Install a Bootloader
If y'all are building your own Arduino, or need to replace the IC, you will need to install the bootloader. You lot may besides accept a bad bootloader (although this is very rare) and need to reinstall the bootloader. In that location are also cases where you lot've put your board in a weird setting and reinstalling the bootloader and getting information technology back to mill settings is the easiest fashion to gear up it. Nosotros've seen boards where people have turned off the serial port meaning that at that place is no style to upload lawmaking to the board, while in that location may be other ways to fix this, reinstalling the bootloader is probably the quickest and easiest. Similar I said, having a bad bootloader is actually very very rare. If you have a new board that isn't accepting code 99.nine% of the time its not the bootloader, but for the 1% of the fourth dimension it is, this guide will help you lot fix that problem.
Selecting a Programmer
We are going to talk about two different types of programmers you can use to install or reinstall bootloaders.
Option one: Dedicated Programmers
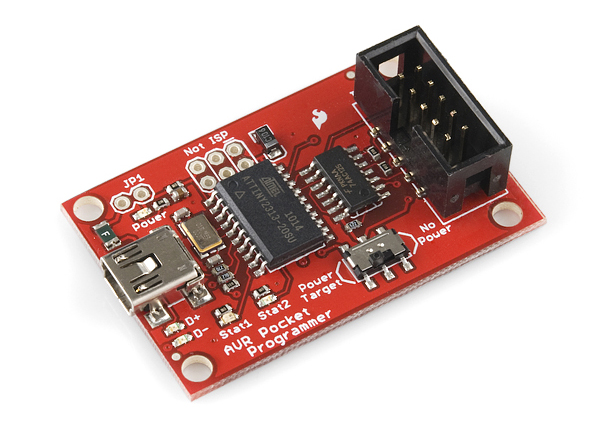
For a quick easy developer we recommend looking into the AVR Pocket Programmer (Windows just).
Or, you tin can use the official Atmel AVR MKII developer (At present discontinued) or the Atmel JTAG ICE3 programmer.
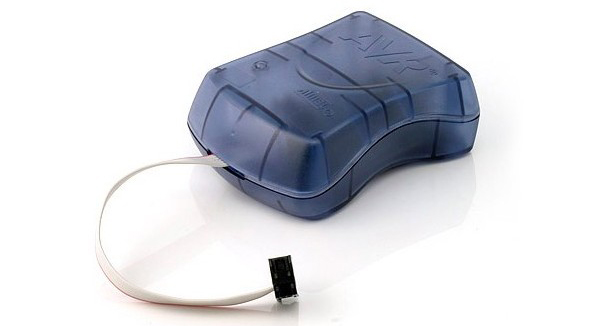
AVR MKII
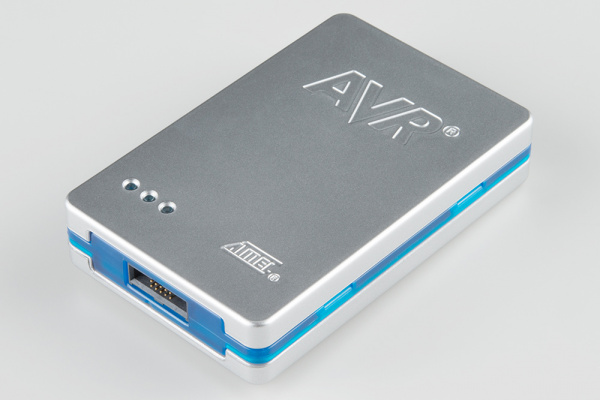
JTAG ICE3
The AVR Pocket Programmer or virtually cheaper options will work simply fine for most applications, but they may have problems with some boards, specifically ones with lots of memory like the ATMega2560 based boards.
Selection 2: Using the Arduino every bit a Programmer
The other selection is grabbing an Arduino Uno (or Duemilanove). If you go into the Arduino IDE you lot will meet an example sketch chosen'Arduino as ISP.' If you upload this lawmaking to your Arduino, it volition basically act as an AVR programmer. This isn't really recommended for production of boards, or boards with lots of retentiveness, but, in a pinch, it works pretty well. Also every bit of this writing the lawmaking only works on ATmega328 boards. Maybe one day it will work on the Leonardo or Due, but not yet.
Connecting the Programmer
In-Circuit Serial Programming (ICSP)
It's very uncommon to plan ICs before they are soldered onto a PCB. Instead, most microcontrollers have what's called an in-system programming (ISP) header. Specially, some IC manufacturers, such as Atmel and Microchip, have a specialized ISP method for programming their ICs. This is referred to as in-circuit series programming (ICSP) Most Arduino and Arduino compatible boards volition have a 2x3 pin ICSP header on them. Some may even accept more than than one depending on how many ICs alive on the PCB. It breaks out three of the SPI pins (MISO, MOSI, SCK), and power, ground, and reset. These are the pins you'll need to connect your programmer to in gild to reflash the firmware on your board.
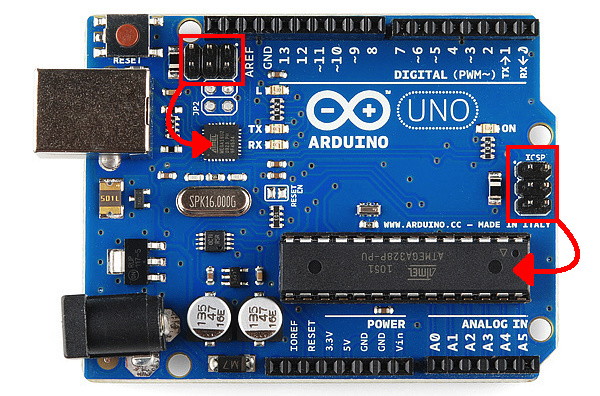
Here we have the Arduino Uno R3. It has two ICSP headers: one for the ATmega16U2 and 1 for the ATmega328. To reflash the bootloader on this board, you would use just the ICSP header for the ATmega328.
On some smaller boards you may non see this connector, but the pins should be cleaved out elsewhere. Whether you're using an SMD IC or a DIP IC, the Internet access provider pins should exist accessible in 1 form or another. Some boards might but accept test points for the Internet service provider header. If this is the case, you may want to consider getting an Internet service provider Pogo Adapter. This kit allows you to temporarily make a practiced connection with test test points in order to reprogram your IC.
ISP Pogo Adapter Kit Fully Assembled. Y'all tin connect any of the programmers we mentioned in the previous section to this lath.
If you are having problem finding the ICSP pins on your particular Arduino board, you can consult this website for detailed pinouts of about Arduino related ICs and so some.
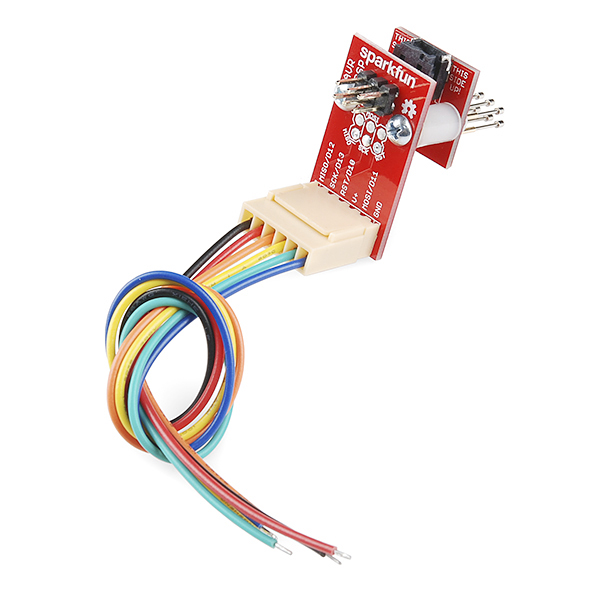
Once you have located thehalf-dozen ICSP pins on your board, it'south time to claw up your programmer to the board. You lot tin utilize a programming cablevision to connect the two, or, if yous don't accept a cable, y'all can just use some male person-to-female jumper wires.
If y'all are using a programmer such as the MKII or the Pocket Programmer, your setup should look something similar this:

Click for larger prototype.
Or, if yous're using the Arduino as your developer, it should look like this:

Click for larger image.
Here's a table to help analyze which connections go where.
| Arduino equally Internet service provider | AVR Programmer | Internet service provider Header | ATmega328 | ATmega32U4 |
| Vcc/5V | 5V | Pin 2 | Vcc | Vcc |
| GND | GND | Pin six | GND | GND |
| MOSI/D11 | MOSI | Pin 4 | D11 | D16 |
| MISO/D12 | MISO | Pin 1 | D12 | D14 |
| SCK/D13 | SCK | Pivot three | D13 | D15 |
| D10 | Reset | Pivot 5 | Reset | Reset |
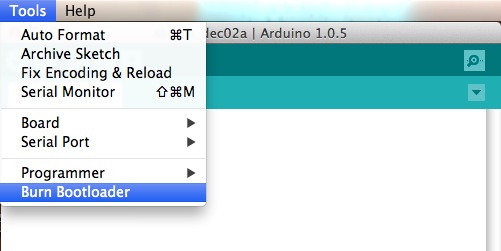
Uploading Code - Easy Way
The easy way to upload the bootloader involves using the Arduino IDE. Open up your IDE select the board y'all want to program. Then select the developer (if you are using the Arduino equally Internet access provider yous will likewise demand to select the COM port that the Arduino as Internet access provider is connected to). Then select BurnBootloader. This will accept the board you lot selected and look up the associated bootloader in the board.txt file. Then, information technology will find the bootloader in the bootloader binder and install it. This only works if the board is installed correctly in the IDE and yous have the correct bootloader.
If for some reason you want to use a bootloader that isn't installed in the Arduino IDE, visit the nest section. However, it's probably easier to just install the bootloader from the Arduino IDE. For those who are curious about settings such every bit fuse bits, have no fear. Arduino takes care of all the messy details for you when you burn down bootloaders through it.
Uploading Code - Hard Fashion
The difficult way is for those people who desire to employ the command line. This method may be more than preferable if you are modifying and recompiling and don't want to have to go along updating the IDE, only otherwise its pretty unnecessary. Again you will need to go the programmer, and hook everything up. In this example we are using avrdude on Windows.
There are two steps to this process. The first step involves setting the fusebits. Fusebits are the part of the AVR flake that determine things similar whether you are using an external crystal or whether yous want brown out detection. The commands listed below are for the Arduino Uno using an ATMega328, they will probably work on some other similar boards such every bit the Duemilanove, just make sure yous know what you lot are doing before playing with fusebits (NOTE: these fusebits will not work on a 3.3V/8MHz lath). All the required fuse $.25 are listed in the boards.txt file for different boards, just over again, if yous have a boards.txt file installed then simply employ the Piece of cake Style.
Arduino as ISP: avrdude -P comport -b 19200 -c avrisp -p m328p -v -due east -U efuse:w:0x05:m -U hfuse:due west:0xD6:thou -U lfuse:w:0xFF:chiliad
AVR Pocket Programmer:
avrdude -b 19200 -c usbtiny -p m328p -five -east -U efuse:west:0x05:one thousand -U hfuse:w:0xD6:m -U lfuse:west:0xFF:1000
The 2d step is really uploading the program.
Arduino equally ISP:
avrdude -P comport -b 19200 -c avrisp -p m328p -5 -e -U flash:w:hexfilename.hex -U lock:due west:0x0F:1000 AVR Pocket Programmer: avrdude -b19200 -c usbtiny -p m328p -5 -e -U wink:west:hexfilename.hex -U lock:w:0x0F:m
One last flake of info. Every bit we stated before, a bootloader is essintially a .hex file. Thus, you tin apply this method to upload and code you wish to your ICs.

Source: https://sparkfuneducation.com/how-to/installing-an-arduino-bootloader.html
Posted by: dykebutiedis.blogspot.com
0 Response to "How To Install A Bootloader To Arduino Clone"
Post a Comment